
Drum brakes are located behind the rear wheels on many vehicles, and because the components are enclosed inside a metal housing, wear can be difficult to detect. If you want to know how to check drum brakes, this guide walks you through the inspection process, from checking the brake shoes and drums to inspecting the wheel cylinders, springs, and self-adjusters. Knowing what signs of wear to look for can also help you understand how long drum brakes last and when they may need replacement.
how To Check Drum Brakes Without Removing Wheel
You can perform a preliminary visual check of the brake shoes without removing the drum, but a complete inspection requires removing it.
01
Look through the inspection hole.
Many backing plates have an inspection opening near the adjuster. Use a flashlight to visually inspect the lining for obvious signs of wear or oil and grease contamination.
02
Listen while braking
Squealing, grinding, or other unusual noises may indicate worn, damaged, or contaminated brake components.
03
Check pedal feel
A soft pedal or excessive pedal travel may indicate a brake system problem and should be investigated before continuing.
04
Check for fluid leaks.
Look around the wheel cylinder and backing plate for signs of brake fluid or grease contamination.
How To Check Drum Brakes For Wear
Once the drum is removed, inspect each component in turn.
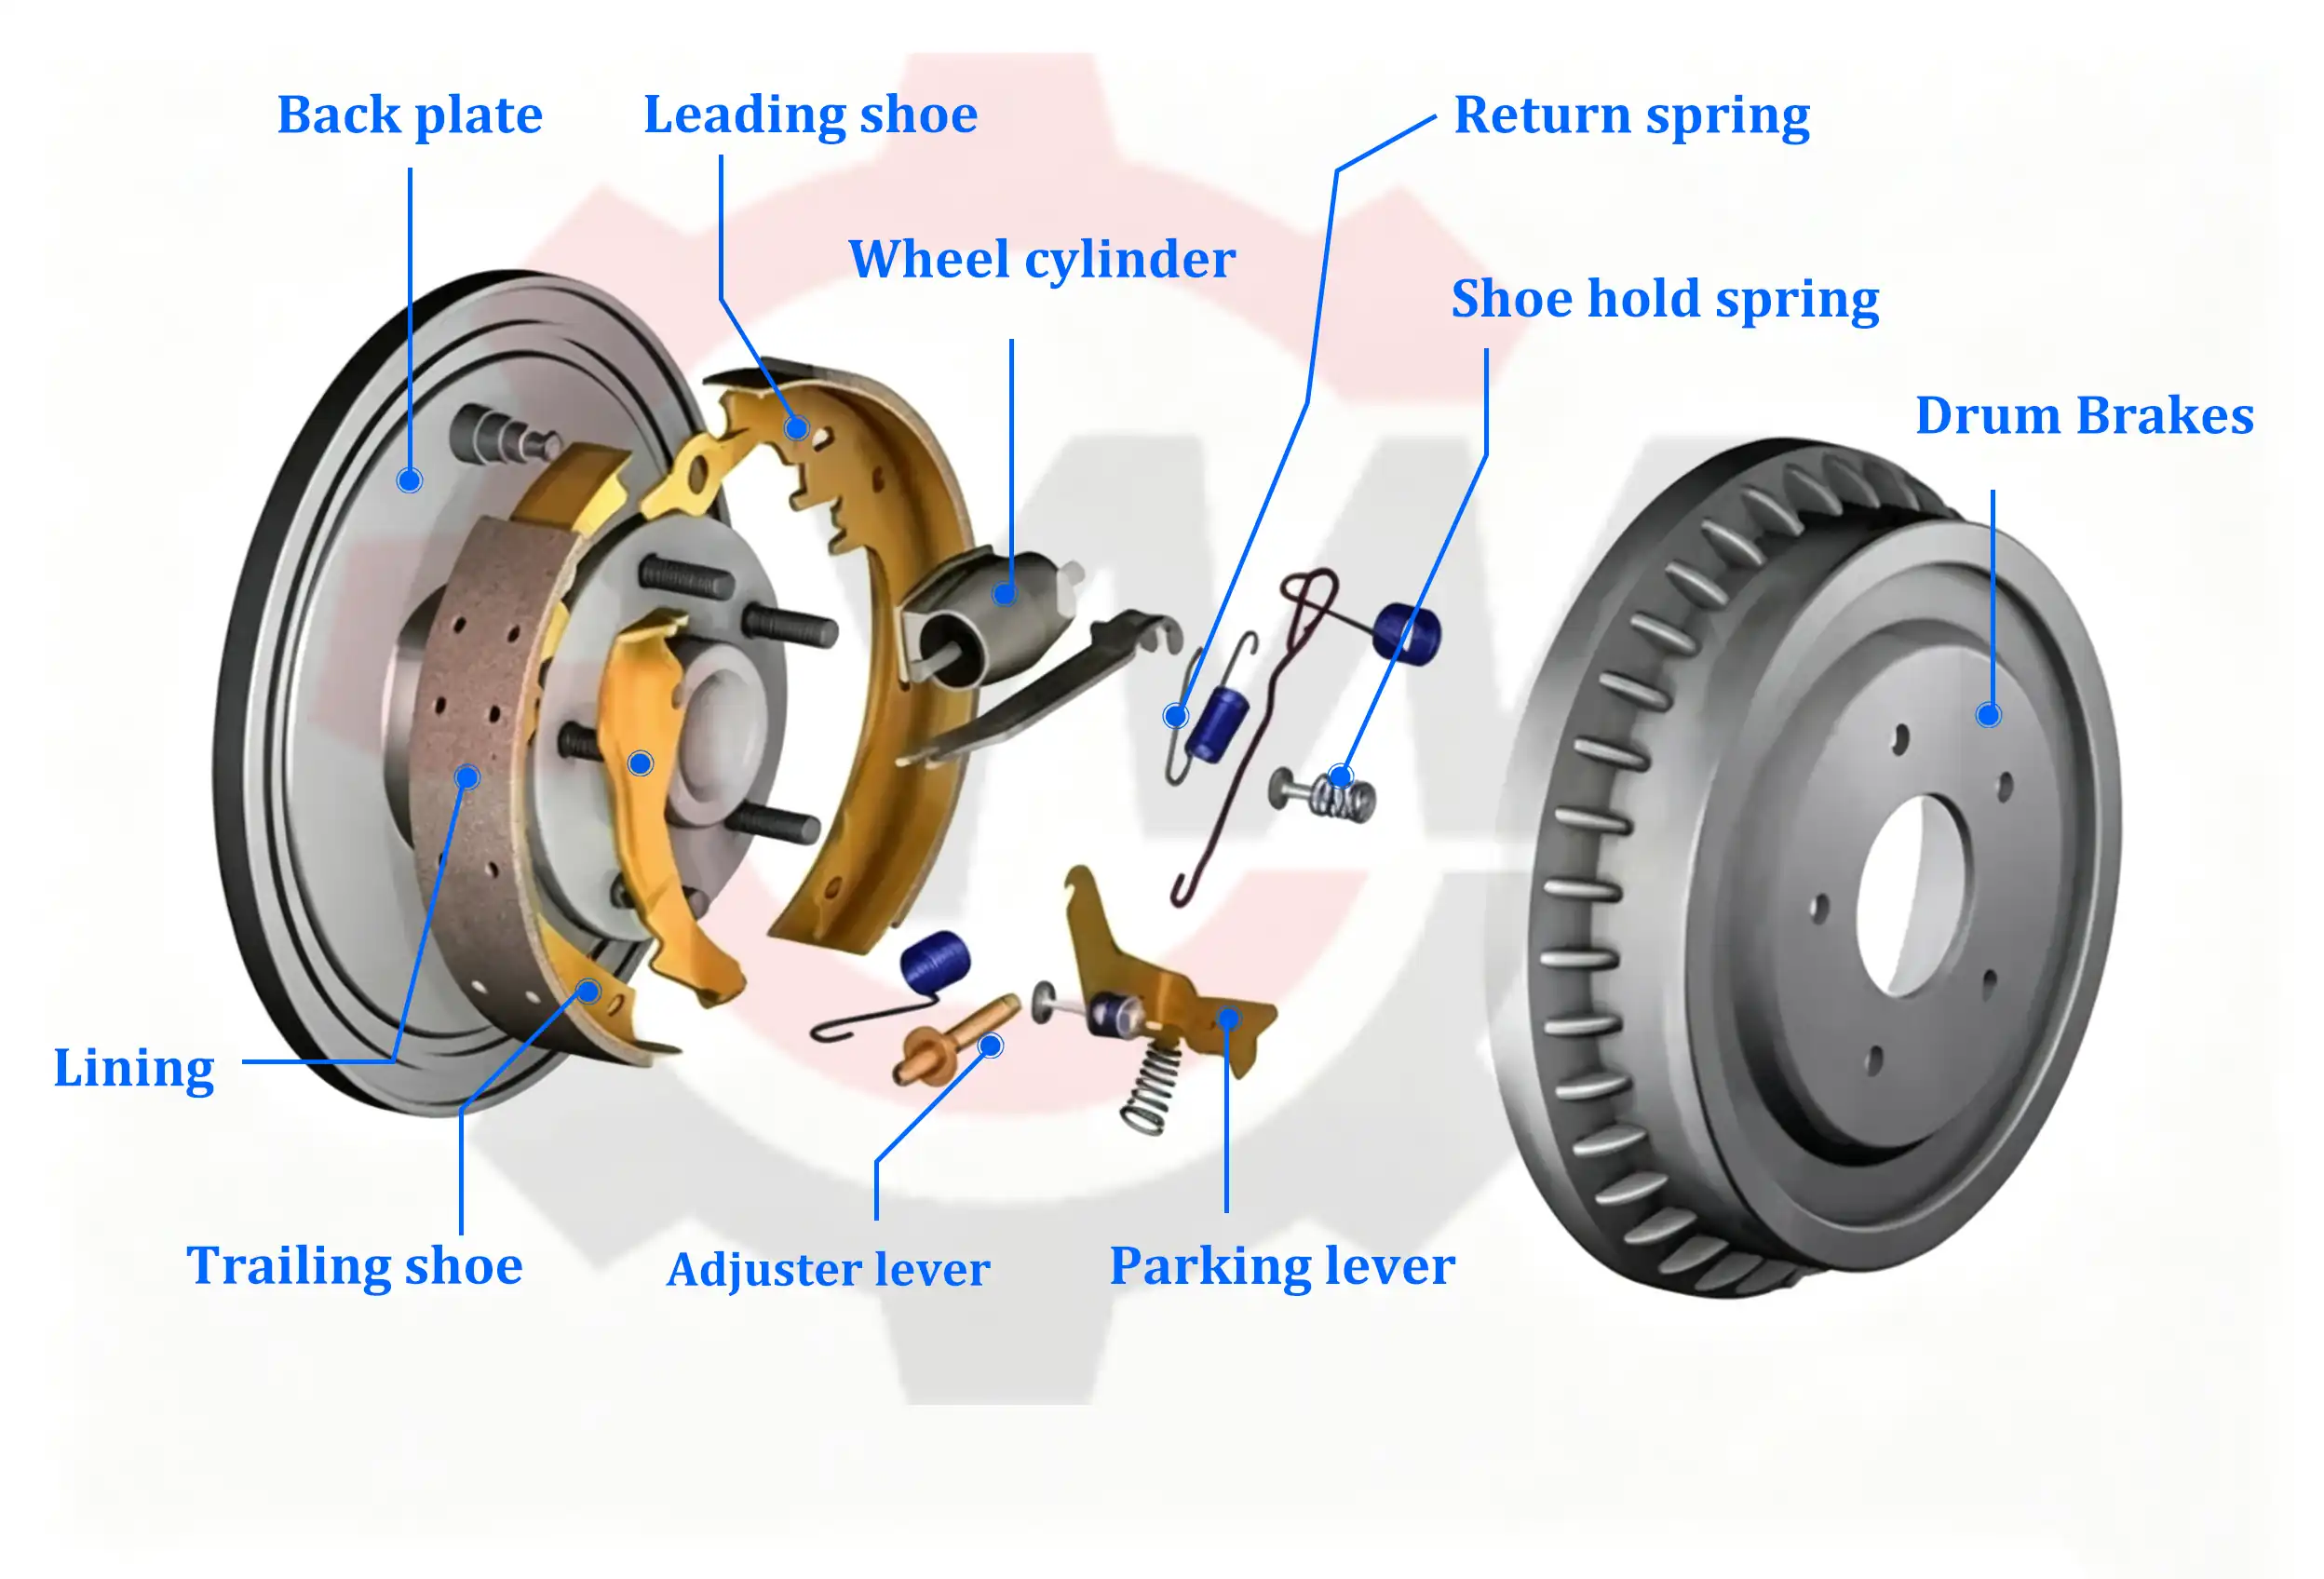
01.
Brake Drum Inspection
Inspect the inner braking surface for cracks, deep scoring, heat checking, hard spots, or other signs of damage. Measure the inside diameter at several points around the circumference and compare the measurements with the specifications in the workshop manual. If the drum is out of round or exceeds the manufacturer’s maximum allowable diameter, it may need to be machined or replaced. Deep scoring or severe surface damage may also require machining or replacement.
02.
Brake Shoe Inspection
The lining should wear evenly, with no bald spots or excessively thin areas. Check that the friction material remains above the minimum thickness specified by the manufacturer. For riveted brake shoes, make sure the lining has not worn down to the rivet heads. If the lining is at or near the manufacturer’s minimum thickness, replace the brake shoes.
03.
Wheel Cylinder Inspection
Peel back the rubber dust boot on each wheel cylinder and check for signs of brake fluid leaking past the piston seal. Check that the piston moves freely according to the vehicle manufacturer’s recommended procedure. Any visible fluid or a seized piston may indicate that the wheel cylinder needs to be rebuilt or replaced.
If the backing plate is damp or contaminated, determine the source of the contamination. Inspect the wheel cylinder and axle seal and repair the source of the leak as necessary.
04.
The Springs and Self-Adjusters
Check each return spring for damage, stretching, or kinks. Inspect the self-adjuster cable and linkage, and make sure all components are properly seated and connected. Clean the self-adjuster as needed to remove rust and debris, and make sure it moves freely and operates correctly.